Adding New Clients
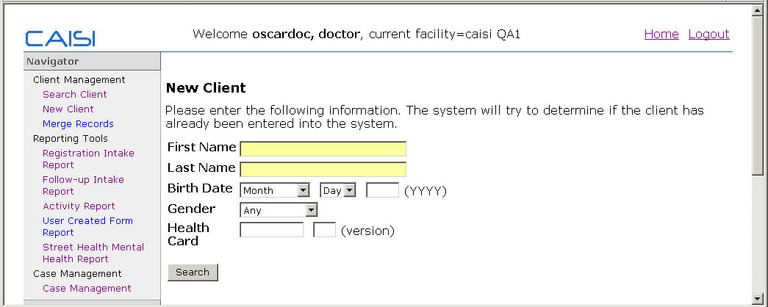
1. On the PMM’s left panel, under Navigator, click New Client to open the New Client intake form.

2. To avoid creating a duplicate file, type the client’s first and last name in the First Name and Last Name boxes, and then click the Search button. One of two results occur:
-
If the system finds one or more similar names in the system, those names are displayed as shown in the following graphic:

- If the name in the list is a match, beside the name, click the Update Local button (if the client is already in the CAISI system) or the Copy to Local button (if the client is already part of the integrated system). This updates the client’s existing Registration Intake form. For details see Step 3.
OR
- If none of the names in the list is a match, click the New Client button at the bottom of the form, then click OK when the message box appears. The Registration Intake is displayed, showing the first and last name, similar to the graphic shown below:

3. Complete as much of the information on the Intake form as you can, including:
-
First Name
-
Last Name
-
Postal Code
-
Client Record Name
If you can, also enter date of birth and the health insurance number/version code,
4. In the Program Admissions area, click the arrow beside the Bed Program or Residence Location drop-down list box and select the program to which you are admitting the client.
Note (1): Only bed programs that are not full to capacity are visible on the list.
Note (2) : It is important to select a program, otherwise the client is placed in a holding tank by default.
5. Then, if appropriate, check one or more of the Service Programs check boxes (for example, Partner Agency 2 Program).
6. When you finish, click Add Record button if this is a new client, or the Save button if you are updating client intake information.
You can refer a client to additional programs when completing the intake form or by selecting the Refer tab on the top of the CAISI client page. For details, see Referring Clients to Programs.
Document Actions

