2.5.2 Creating your own eForms
Creating
Your Own eForms with the eForm Generator
There is an enormous variety of forms being used at clinics today. It would be impossible for the original OSCAR team to create e-forms for every single one. Besides, the beauty of OSCAR's open source individual-oriented concept is that our software and features are easily used to make OSCAR functional for your unique work environment.
There are two main ways you can go about creating an e-form. The easy way and the advanced way. Lets start with the easy one, the eForm Generator: There is even a Video tour of this functionInstructions for eForm Generator
First clean the image of the form you want to use. Use an image program such as Gimp and save as 1500px wide, as grey scale (rather thanRGB/colour) to one of .gif, .jpg, or .png file .
Ideally, the form should come as an "original pdf file", rather than paper from scanning. This gives you the ideal background to work on, with no blemishes, the smallest file, etc. However use what you can get. Resizing is still necessary, and some will take out the checkboxes and input lines. For the smallest file change to gray scale from colour. Always do a test print to see if the quality of the GIMP'd product is acceptable. And do incremental saves, so that you can backtrack if needed.
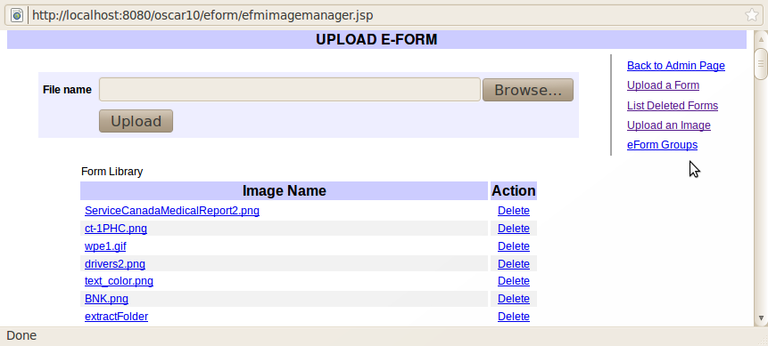
However you get the image file, browse to the file and Upload it.

Then open the eForm Generator from the top of the Edit eForm window by clicking on "Eform Generator"
- Patient Independent hides the eForm from view in the patients chart
- You can also select a provider role that should have access to the particular eform

The on screen instructions should be pretty clear.

Select the image you have just uploaded, in this example a CML pap requisition

Name the form (not essential but good form), in this bad example CML pap. It should be one word, so use CML_pap instead

If there is a Gender check box check the box and then click the button and then click the spot you want the box
In this example the male box has already been placed, the female button has been clicked and the cursor is placed where a click will produce the female checkbox

If you wish to add a signature area then indicate in the box and select either signature "stamps" using scanned signature images that you have loaded into eForm images, or put in a drawing field for individually signed forms. If there are a number of users signatures have them named in different files and have the user's name trigger which one appears. In this case H'utten'-Czapski will trigger the PHC.png signature stamp to be used. Then click the button and drag a box around the area you want the signature to appear.

Add in the fields for inputs one by one, selecting from the database when useful TIP There's an Undo button for when you make a mistake

You can explore your OCD tendencies by fine tuning the location of the boxes by aligning them in four cardinal directions. If you click show/hide input name you will see which field is which

Determine if you want to maximize the window when the eForm loads. (only useful if you have a low resolution monitor) or want to emphasize check-marks (only useful if the office uses Windows(TM) clients)

Generate eForm! by clicking "Load HTML"
Save and Restore will temporarily save your work to and from the browser.
Once you are done with the generator the code will be copy and pasted the code directly into the eform editing page inside the Oscar admin page.
- Save the form by clicking Save button
- DONE!!
Document Actions

